


Step 1
Attention! On the same mobile device where SoftPOS is installed, open the Google Play Store and search for the epay SoftPOS Connector application.
Select the application and install it on your mobile phone.

Step 2
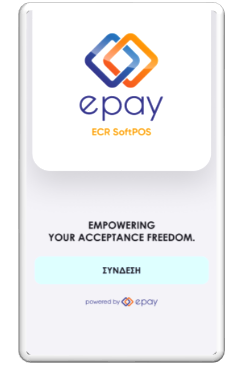
Open the application and select “CONNECT”.
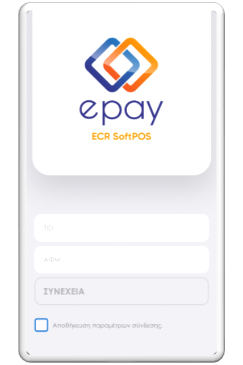
Enter your company’s TID and VAT Number in the corresponding fields.
Note: The TID can be found by selecting the “Settings” icon in the epay SoftPOS application on your mobile phone.
Select “Save connection parameters” so that your login details are saved for future use and easier connection.
Step 3
Before starting the process in the ERP, the certified integration technician must enter the following information through the ERP menu:
- Middleware IP Address: 51.138.96.24
- Middleware IP Port: 11000
- Acquirer ID: 103
- Terminal TID
Step 4
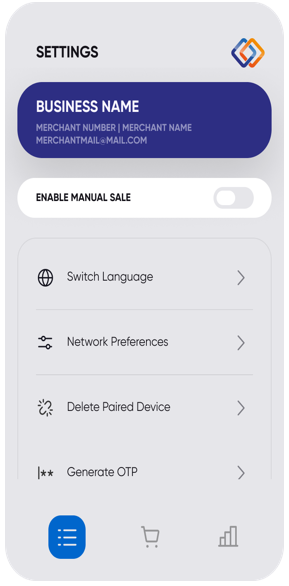
On the Dashboard, select the “SETTINGS” icon located at the bottom left of the screen, represented by the three horizontal lines.
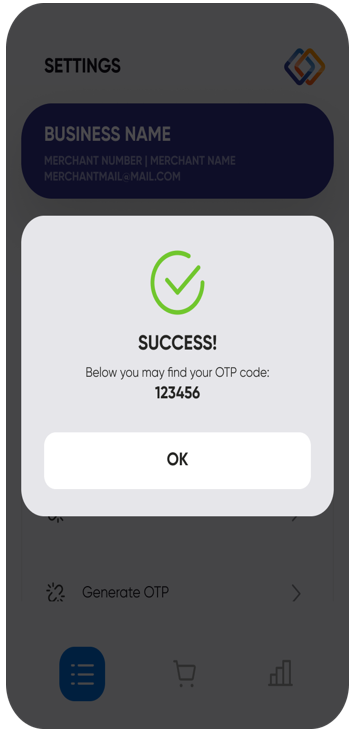
In Settings, at the bottom of the screen, select “Generate OTP”.
Step 5
After completing Step 4, the following message will appear:
“Success. Your OTP code is displayed below:”
Your technician must enter the 6-digit OTP code into the ERP and then perform the first transaction.
Transaction Instructions
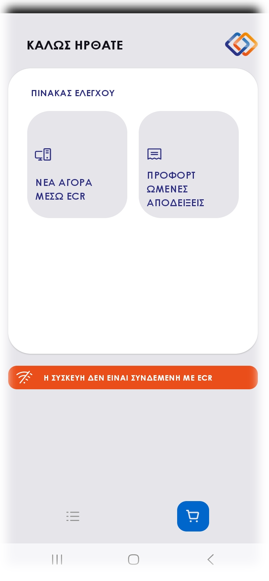
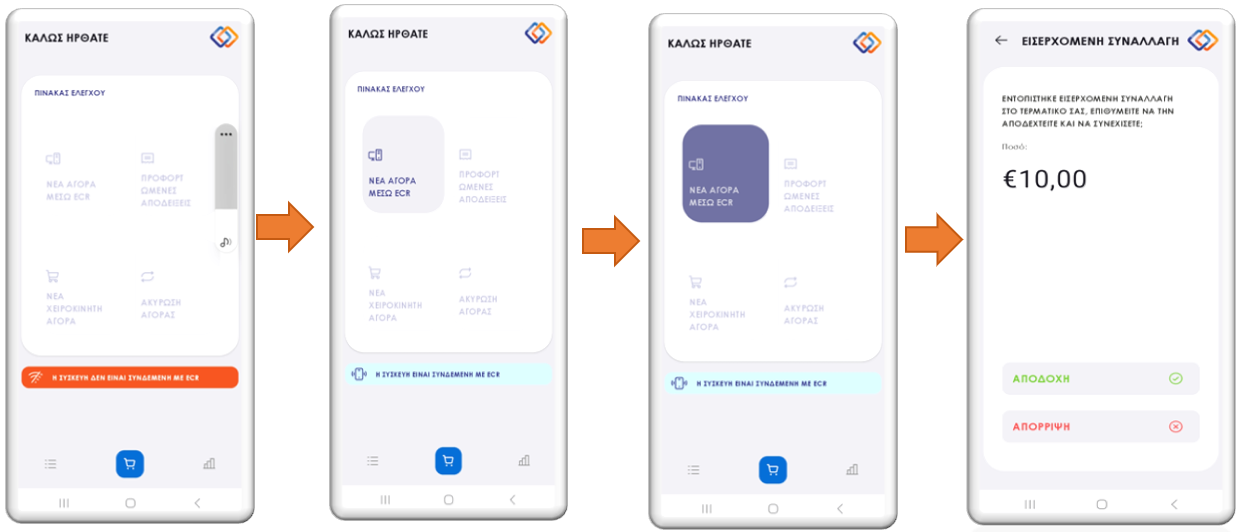
In the epay SoftPOS Connector application, from the “DASHBOARD” menu, select:
“THE DEVICE IS NOT CONNECTED TO ECR”
Once the indication changes to:
“THE DEVICE IS CONNECTED TO ECR”
enter the transaction amount in the cash register.
Press the flashing “NEW PURCHASE VIA ECR” button.
The epay SoftPOS Connector application will automatically redirect you to the epay SoftPOS menu, where the customer can use their card to complete the transaction.
To connect the terminal to the SBZ IKE Provider API, continue with the following steps:
- Go to api.sbz.gr and log in with your credentials.
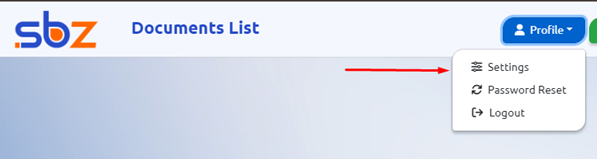
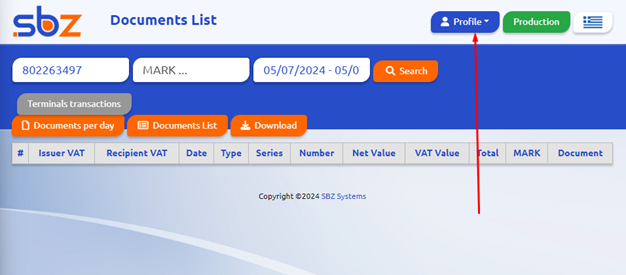 Click on Profile (top right corner) → then Settings.
Locate the Payment Terminals field and enter your Terminal ID:Client ID:Secret

On the right, select your company from the dropdown menu.
In the SOURCE field, type the name of your POS — e.g., CARD (please write it with Latin Characters)
Click Add/Edit
You should see a SUCCESS message.
After updating EMDI, the following field will appear.
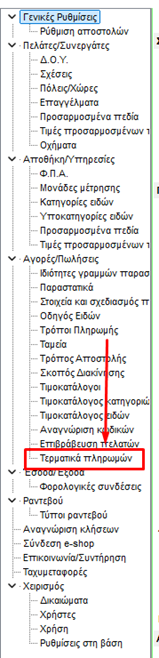
Navigate to Payment Terminals, check ✔️ the WebECR option, and in the Source Name field, enter the POS name exactly as written in the API (e.g., CARD).
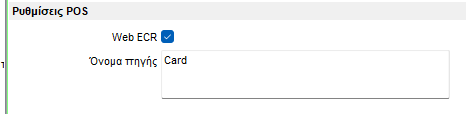
Then go to Payment Methods and create a new method, e.g., CARD POS. Set it as Paid.
Save, close, and reopen Settings ⚙️ (gray icon).
Return to Payment Methods and for CASH, add the newly created method (CARD POS) as an additional payment option.
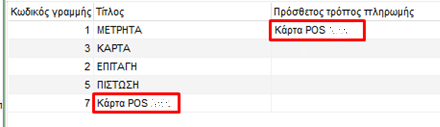
Since we added an additional payment method under CASH, to avoid breaking reports, go to Settings ⚙️ → Sales/Purchases 🔴, and check ✔️ both:
Payment Method – Selection
Automatic selection of additional method
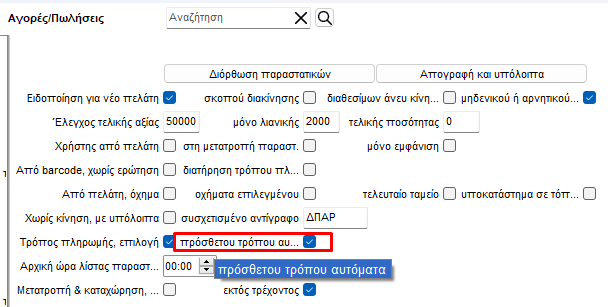
Go to Tax Connections → Variable Mapping. For the payment method you just created, select POS under the MyDATA Payment Method field.
 If you wish to receive payments through Receipts of Collection, go to Settings ⚙️ → Tax Connections → Variable Mapping and adjust the settings as shown in the reference image provided.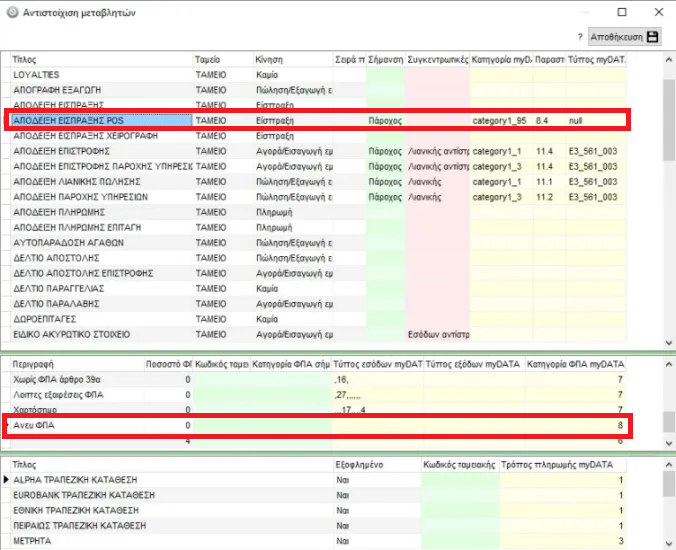
Go to Sales/Purchases 🔴 and create a test Retail Sales Receipt using the product name POS TEST with a price of €0.10.
Ensure that CASH is the default payment method so that the payment window appears automatically.
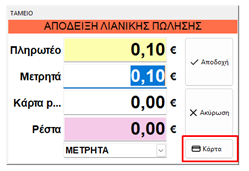
From there, you can split the payment if the customer wishes to pay part by card and part by cash.
If paying by card, click the 💳 Card button.A window will appear asking for installments or tips.
Select the payment method you created (CARD POS) and press the green button on your POS terminal to send the payment.You can also issue a Return Receipt to test refund functionality — this will return the payment back to the customer’s card through the POS terminal.
If everything works properly, log in again to https://api.sbz.gr
and confirm that documents paid by card display the 💳 card icon next to them in your issued invoices list.