SERVER
The first thing you have to do, in order to install properly NetCounter, is to set up a local network.
Then you have to find the name of the server (1) or set a permanent IP to the server (2).
(1)
If you don’t know the server’s name or you want to change it go to Start–>Settings–>Control Panel–>System–>Computer Name–>Change
We assume that the server name is “SERVER”
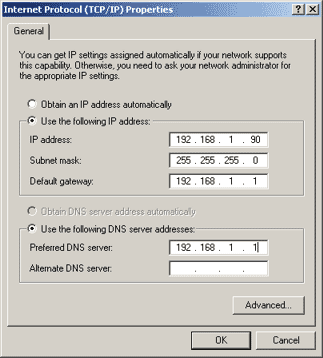
(2)
It is easy:
Go to Start–>Settings–>Control Panel–>Network Connections–>Local Area Connection–>Properties–>Internet Protocol (TCP/IP)
Check “Use the following IP address” and set the IP address you want.
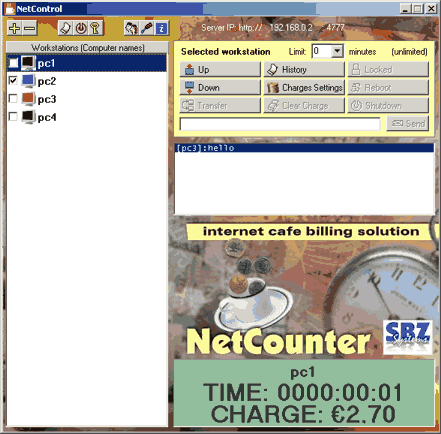
Now, in order to setup workstations, you have to start Netcontrol by clicking its icon. 
CLIENT
Notice the server address (In this example is http://192.168.1.90:4777 or http://SERVER:4777).
Go to the first workstation and open the Internet Explorer. Type the above address and follow the 2 basic steps:
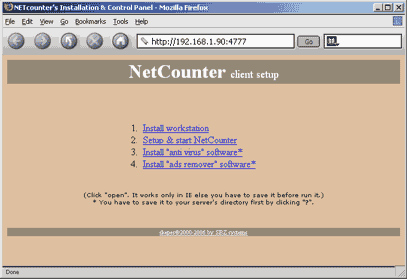
1.Click “Install workstation” to install NetCounter
2.Click “Setup & start NetCounter” to setup workstation
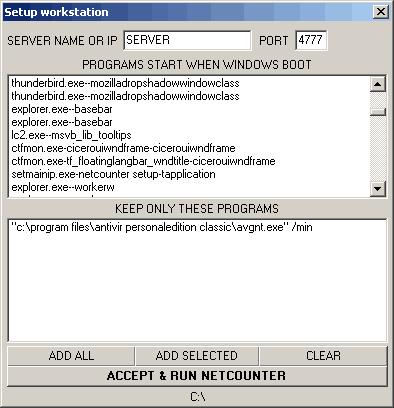
Type server name or IP (192.168.1.90 or SERVER) and port number and then select the programs you want to run. NOTICE that all the other programs will be deleted from the registry in order to not run when windows starts. If these programs already running will be terminated. Finally click “ACCEPT & RUN NETCOUNTER”.
That’s all!
ADD CLIENTS
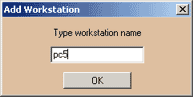
After you finish with all workstations you have to add their names (Computer names) to NetControl (server) by clicking “+” add sign. Notice that it is not always necessary to add workstations manually. NetControl automatically do that after the client installation.
If you don’t know the workstation’s name or you want to change it go to Start–>Settings–>Control Panel–>System–>Computer Name–>Change
