The settings that are required to be done fron a successful connection are:
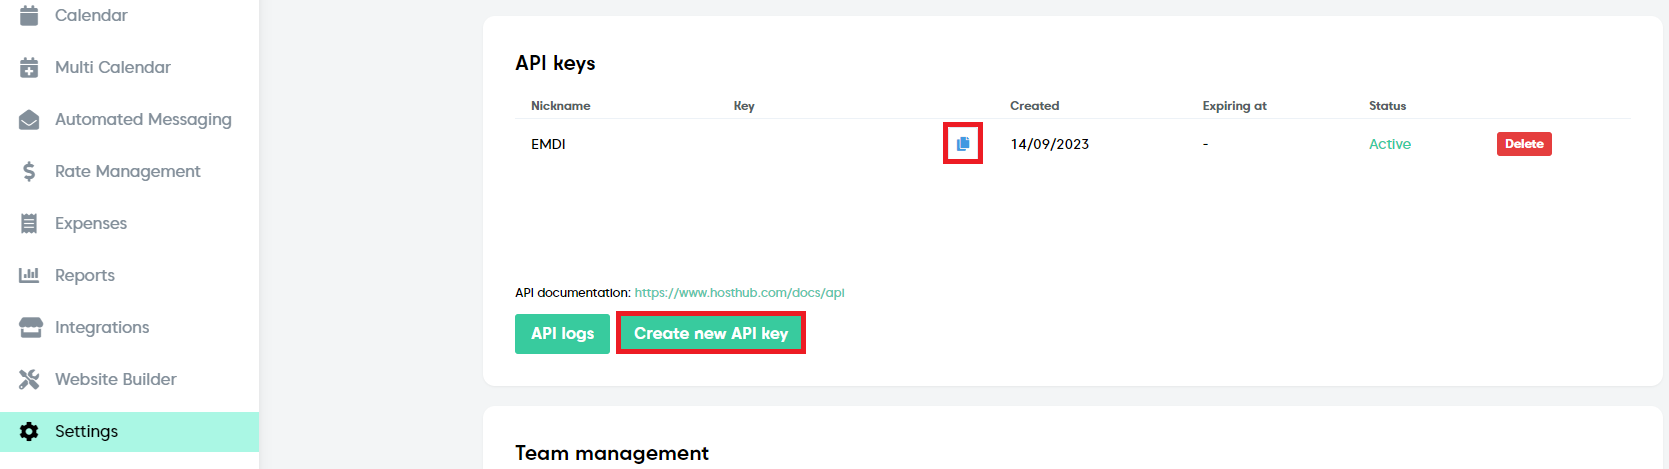
In hosthub, click “Settings”, we create a new API key (by clicking on “Create new API key”) and we copy that, in order to paste it on EMDI’s settings.
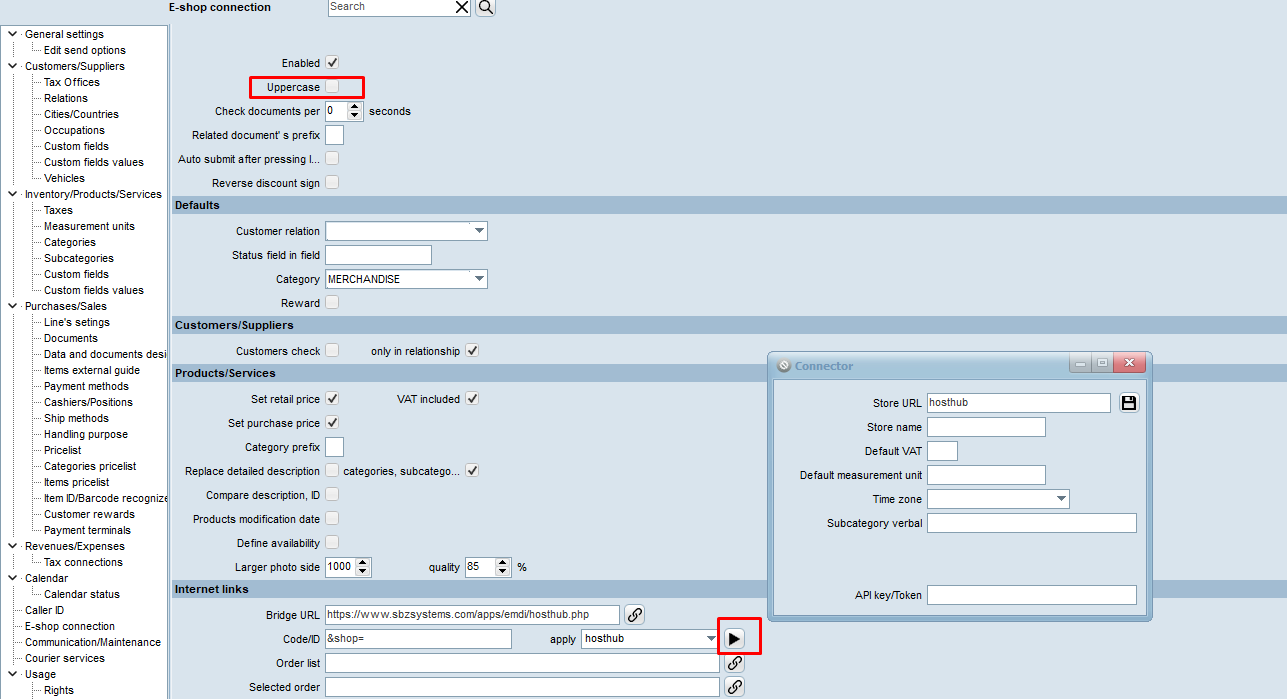
On EMDI, click Settings -> E-shop connection, choose from dropdown on “Apply” hosthub and click the button.
Store URL: hosthub
Store Name: name of the company (as username)
Default VAT: usually 0 or 24
Default measurement unit: measurment unit for products-services for instance STAY (it will have to be created if it doesn’t exist)
Time zon: Europe/Athens
Subcategory verbal: subcategory for products-services
API key/Token: Τhe API key that we copied from hosthub
From the rest settings’ options, the option “Uppercase” must not be selected and finally we enable it.
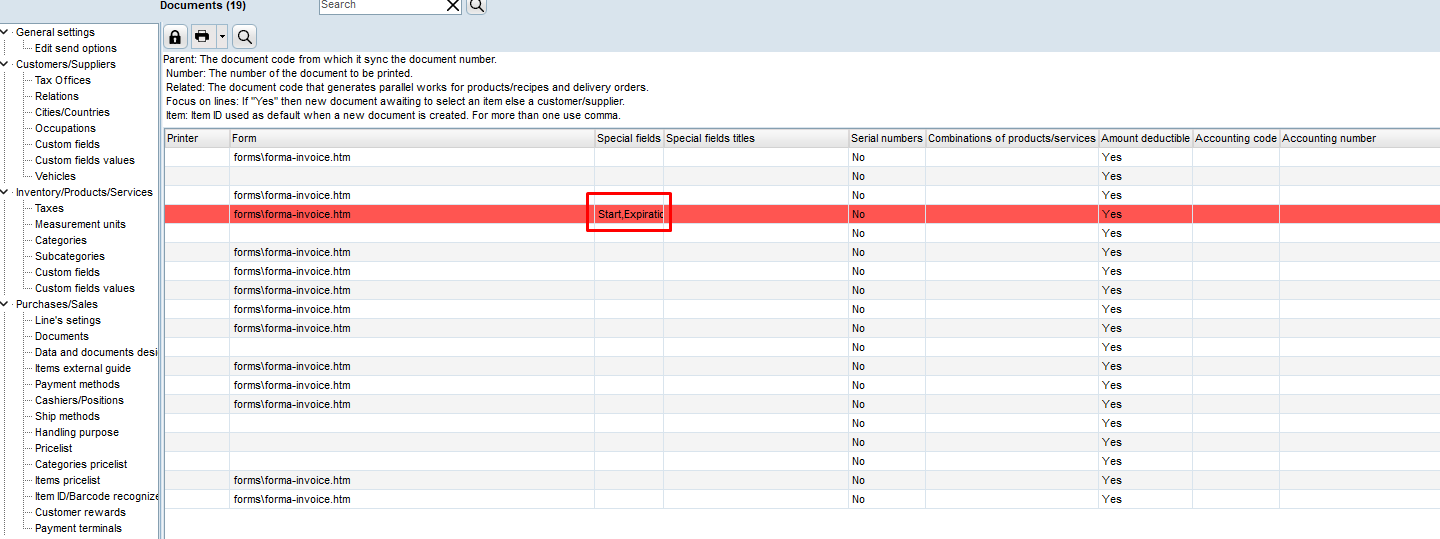
There is an option for some extra fields:
For the date check-in/check-out, we activate “Special fields” “Start” και “Expiration” from “Settings” -> “Documents” (on the document that we are interested in).
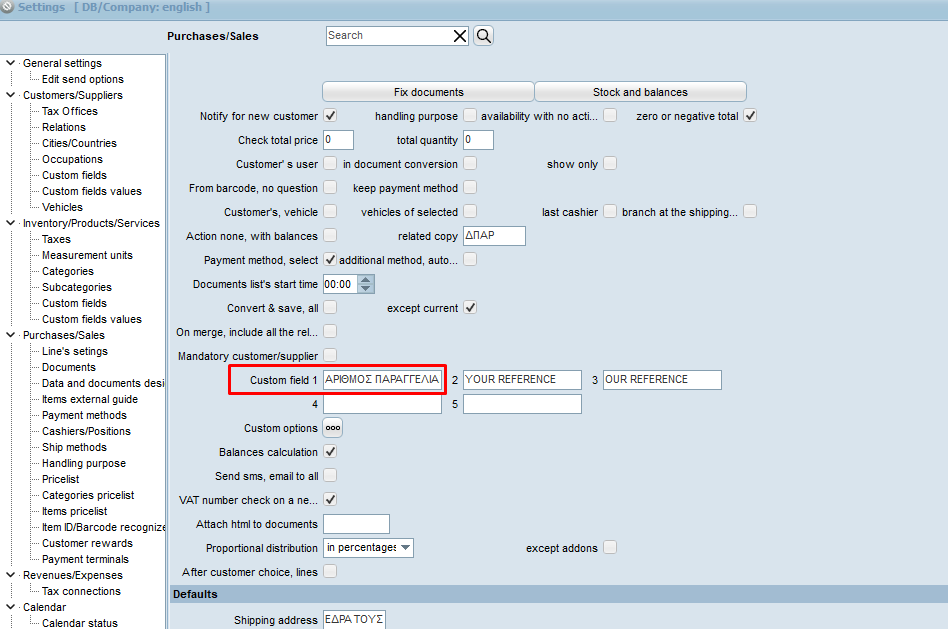
For the reservation’s provenance (booking, airbnb etc.), we activate “Custom field 1” (we name it for example Source) on “Settings”->”Purchases/Sales”.
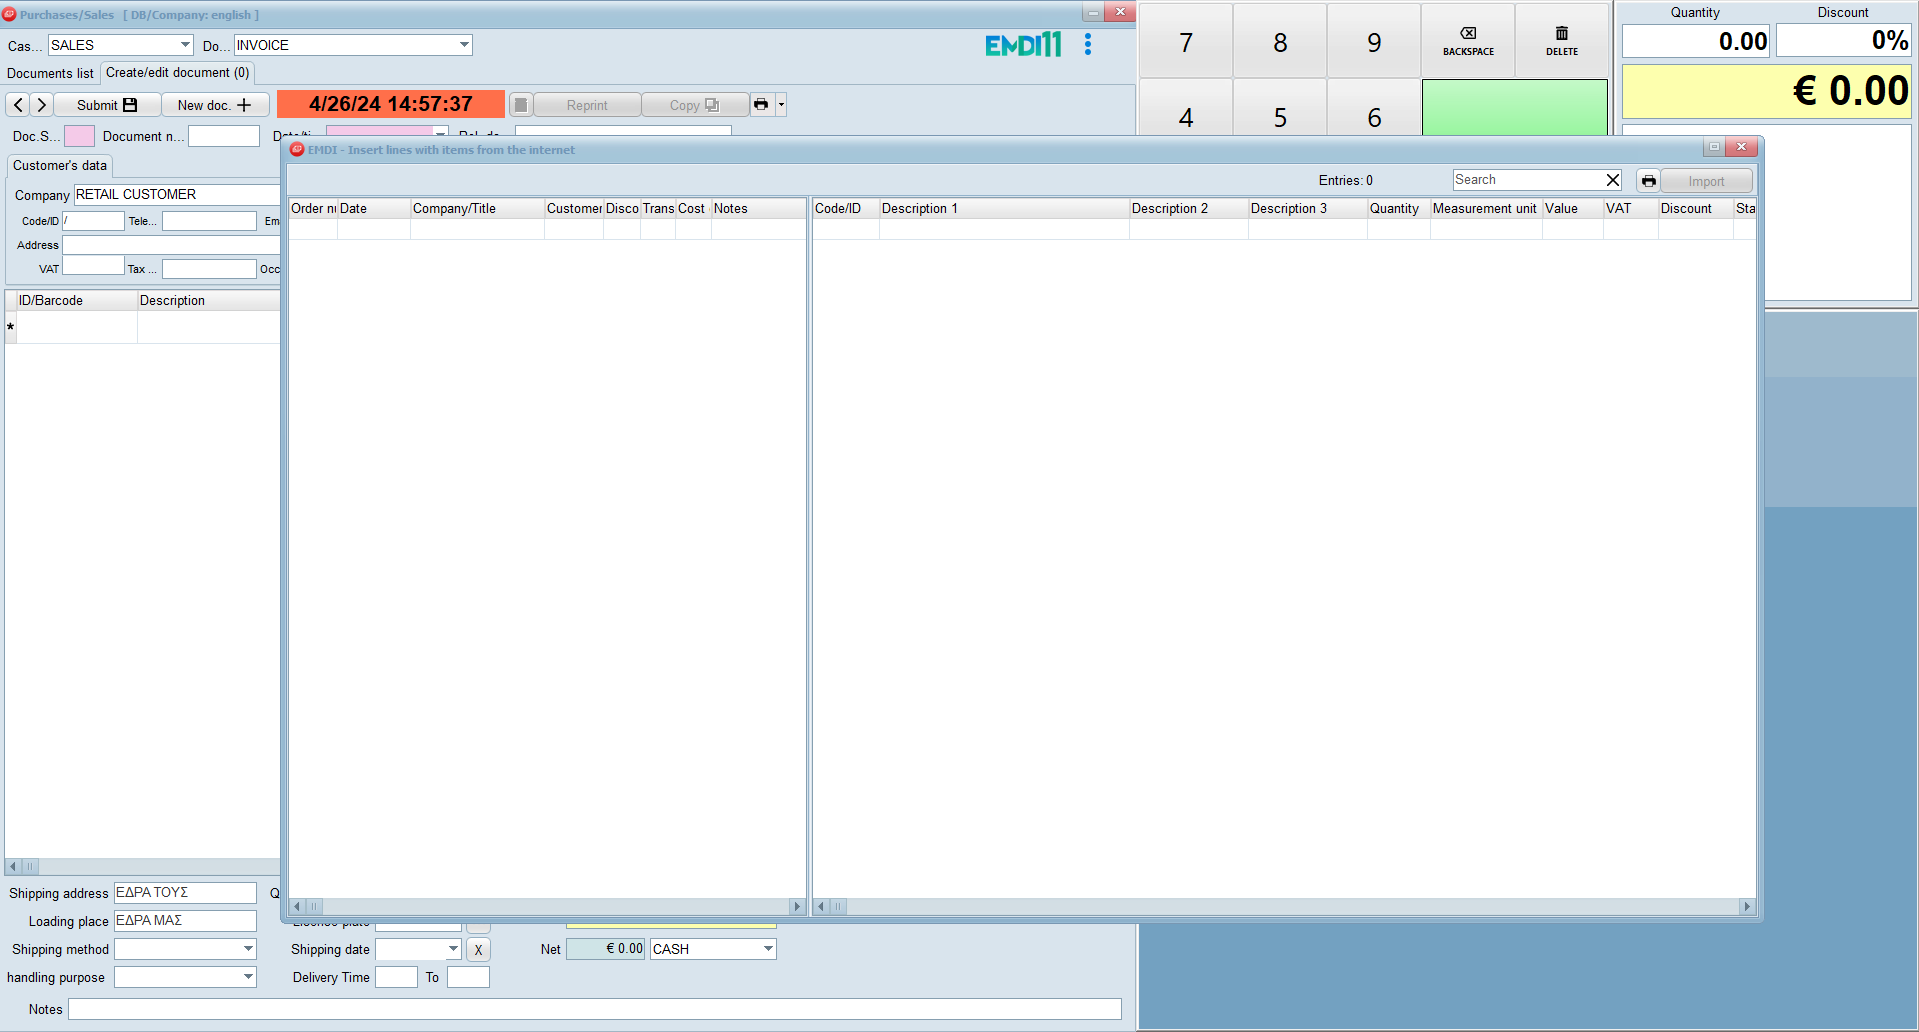
In order to “run” the bridge, on Purchases/Sales (red button) press the “insert” button (on the keyboard) and after we choose the reservation in the left, we click on “Import” on the right.
In the document you can see client’s data(name, surname, phone), data of product-service (ID/Barcode, description, Meas. Unit, VAT, price, start, expiration), on the related document the reservation number, in “Source” (custom field 1) the provenance and on “Comment” notes and other reservation’s fields.