


Follow the instructions below:
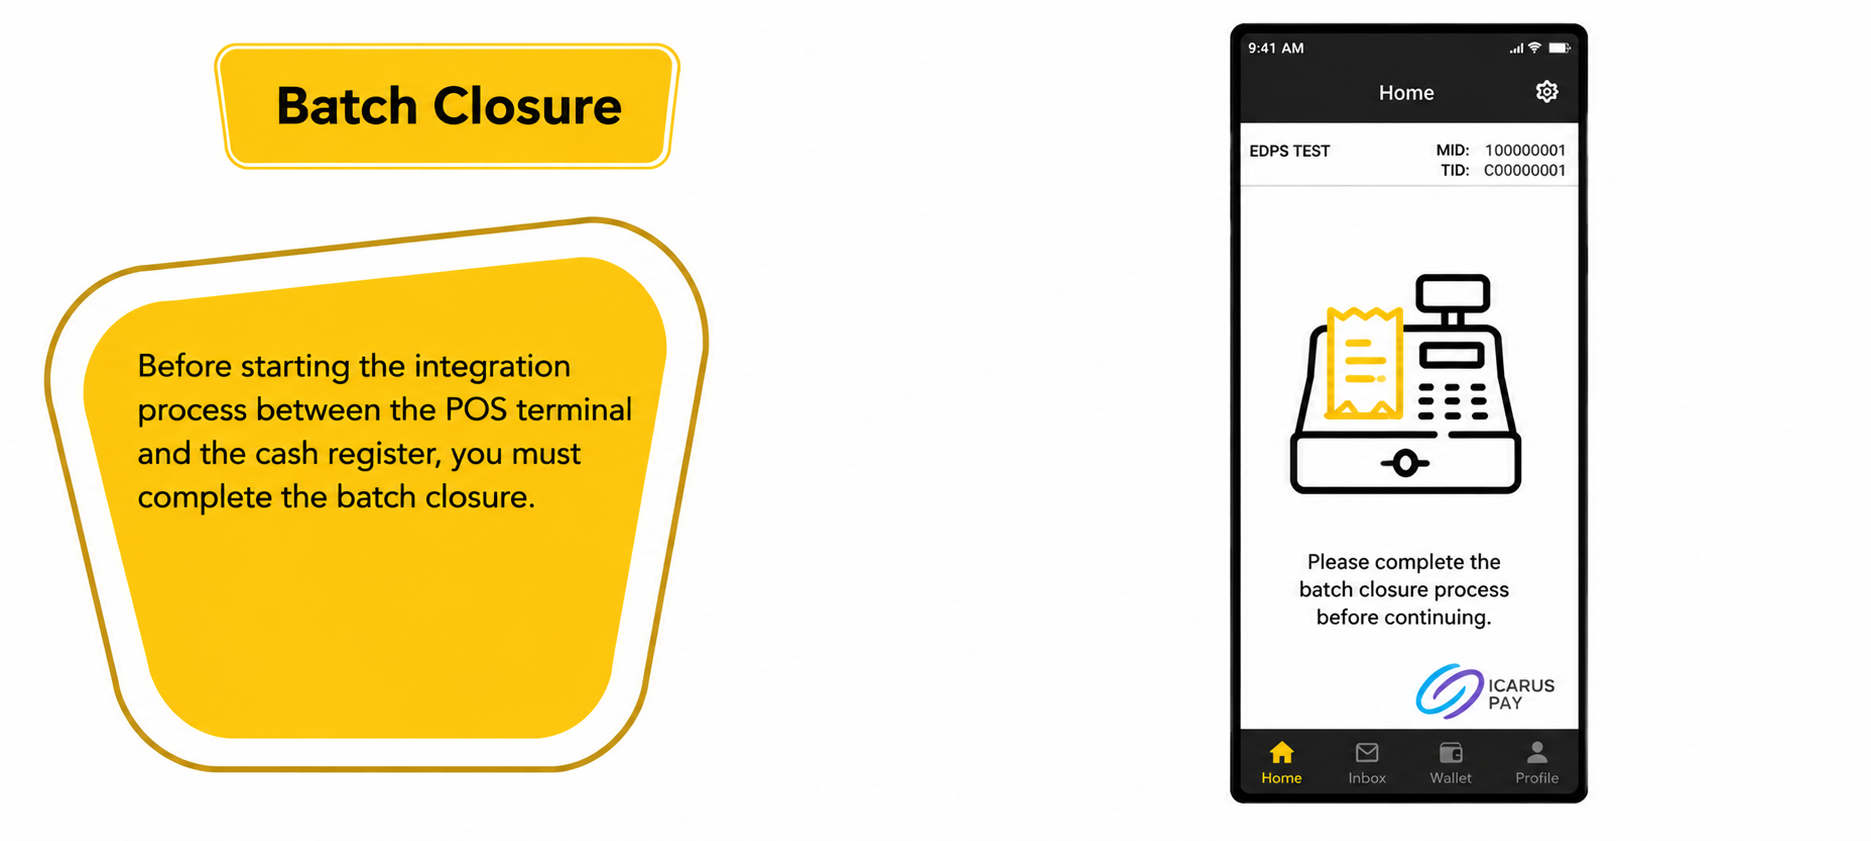
1. Package Closing
Before starting the connection process between the POS terminal and the cash register system, the package closing procedure must be completed through the application.
The user clicks the closing button, and a confirmation message appears indicating that the process has been completed.
2. Protocol Change
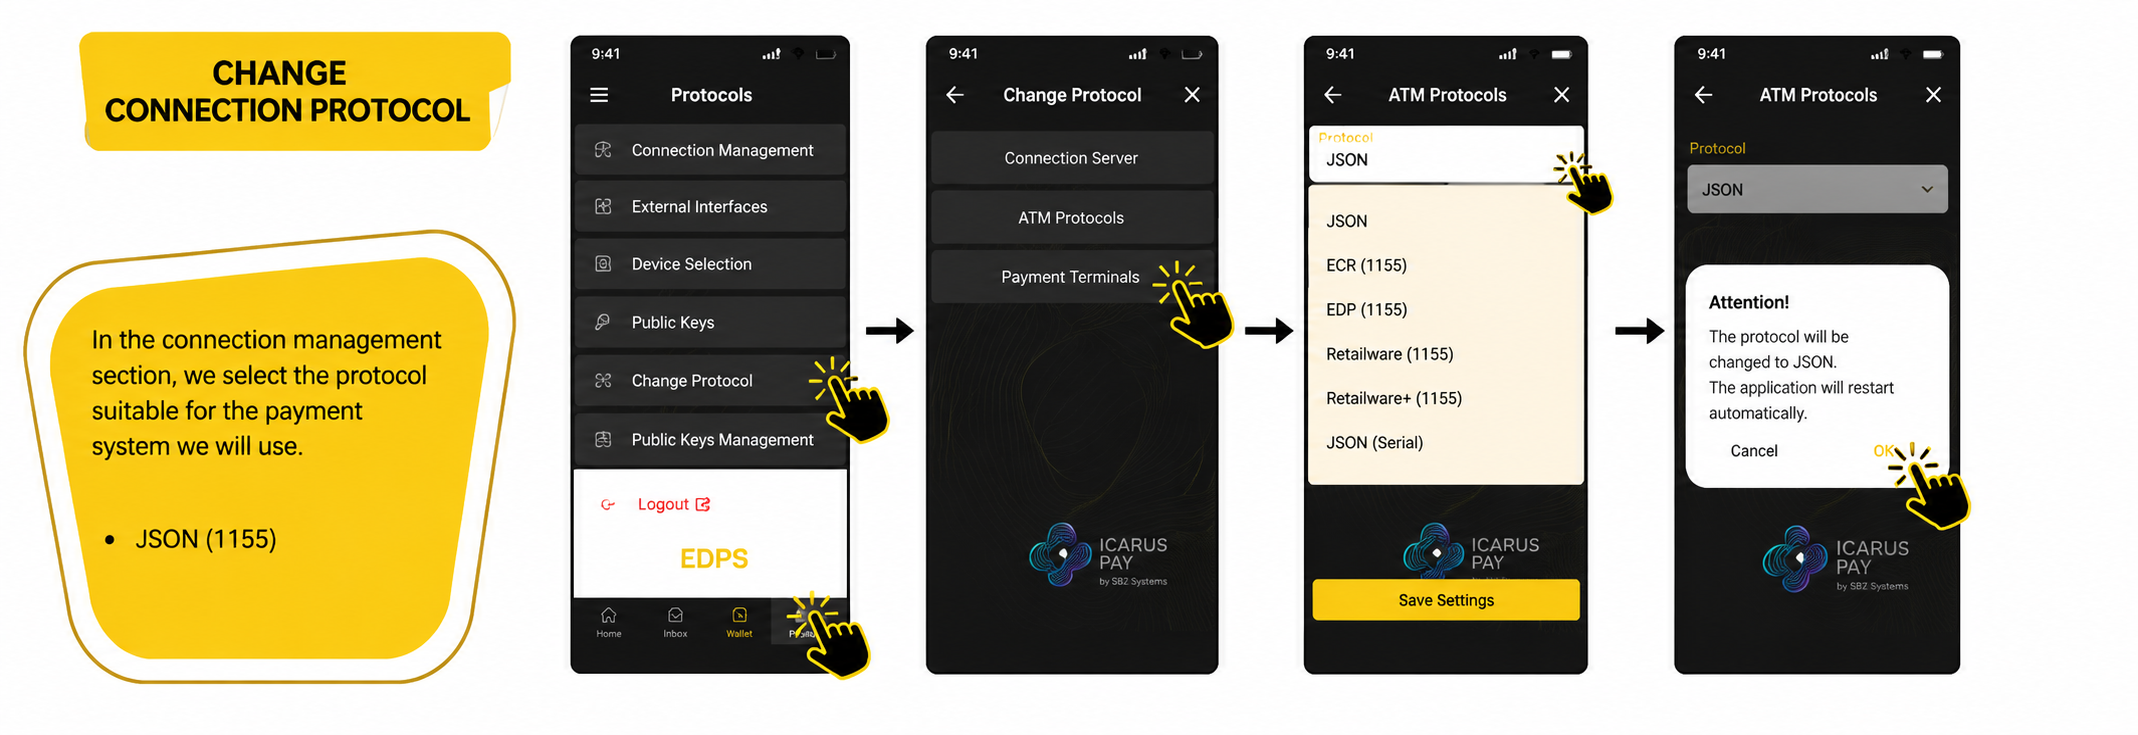
From the Settings menu, select:
AADE Settings -> AADE Protocol -> Middleware (1155)
A confirmation message for the selected protocol will then appear.
3. EDPS WEB ECR (1155)
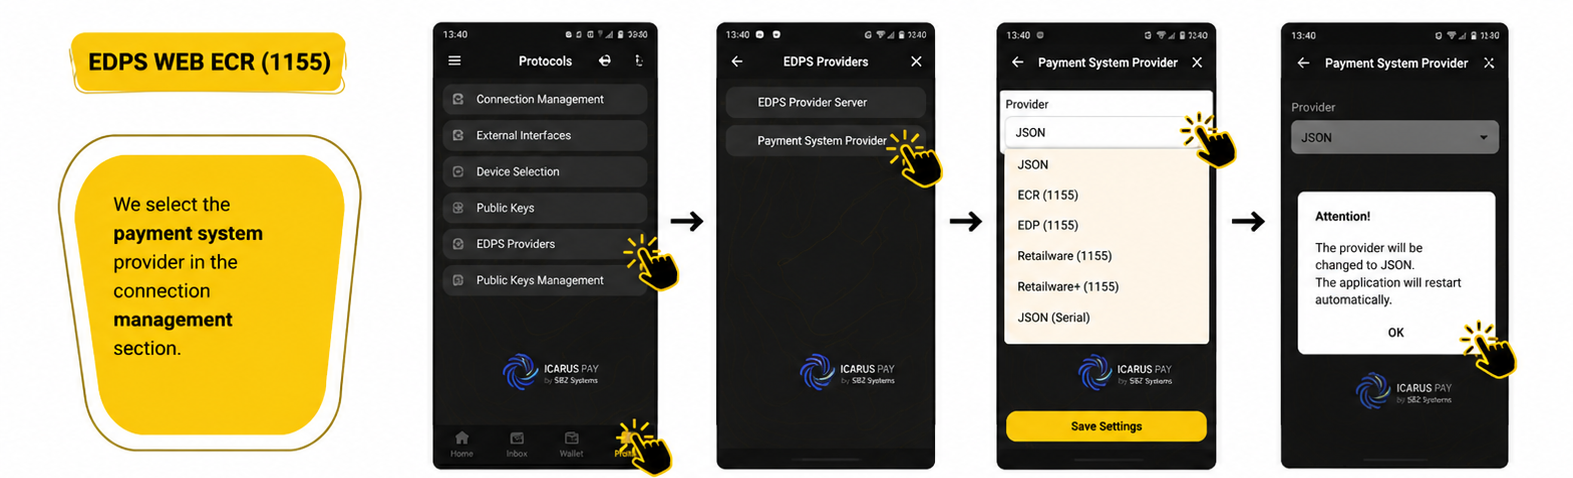
After setting the protocol, select:
AADE Settings -> Terminal Connection -> Terminal Registration -> ERP
In some cases, the ECR operates in place of the ERP.
4. Completing the Connection
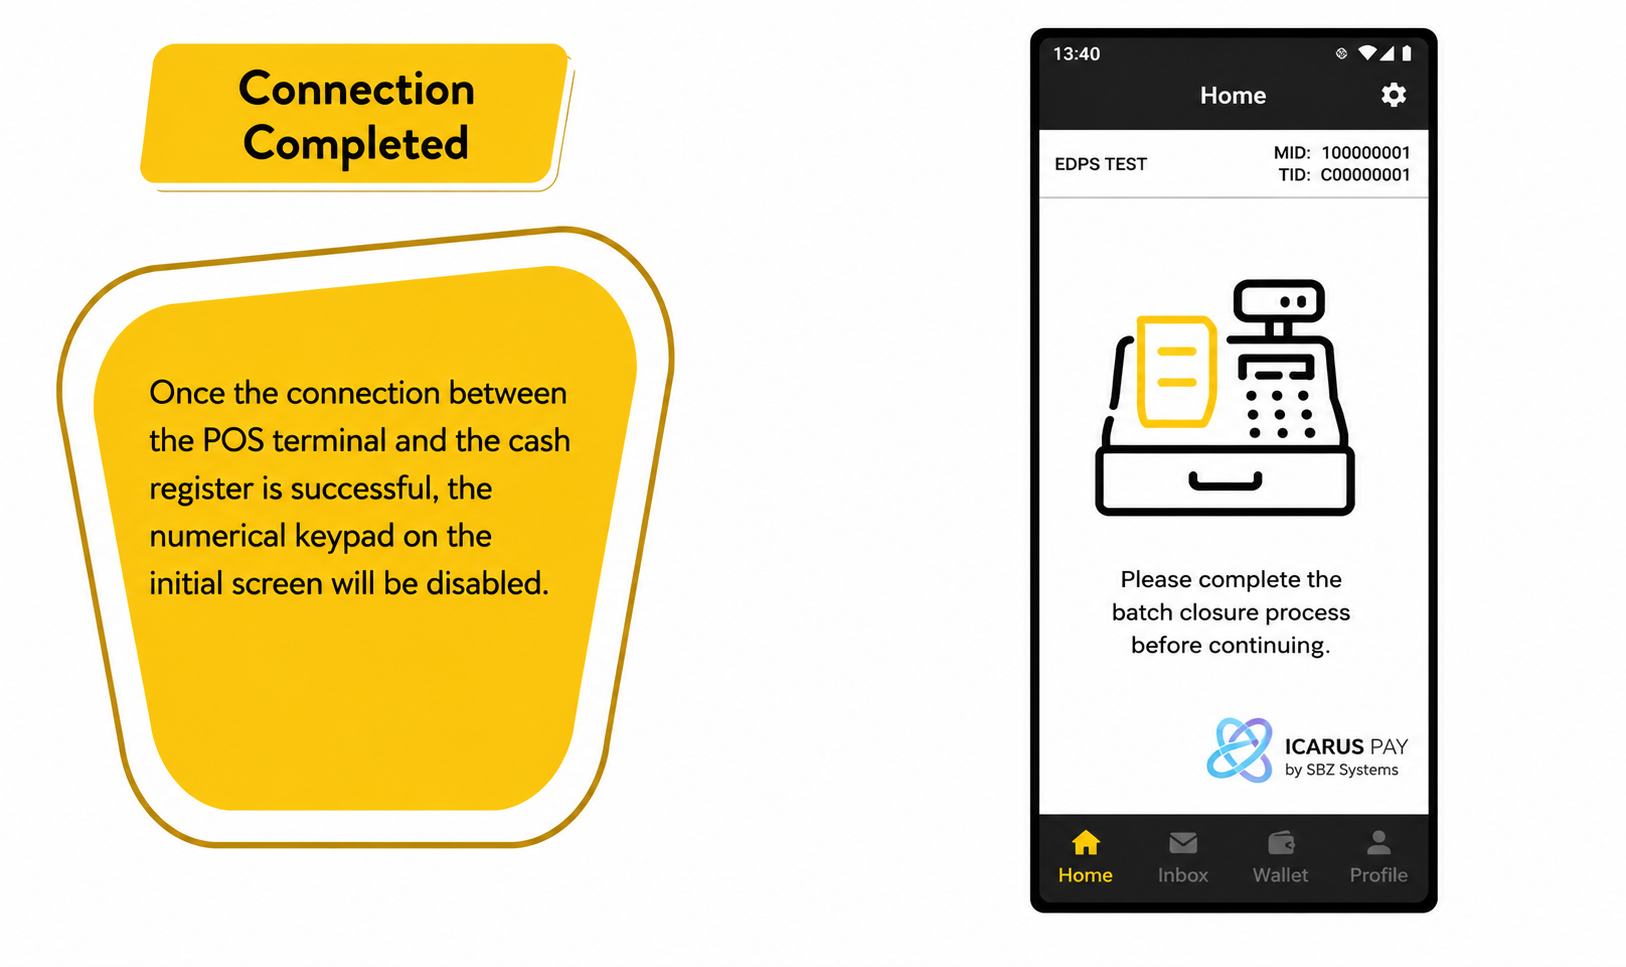
Once the POS connection has been completed successfully, an alphanumeric code will appear. You must save this code.
The numeric keypad on the home screen will also be disabled, confirming that the connection has been completed correctly.
First, go to api.sbz.gr and enter your login credentials.
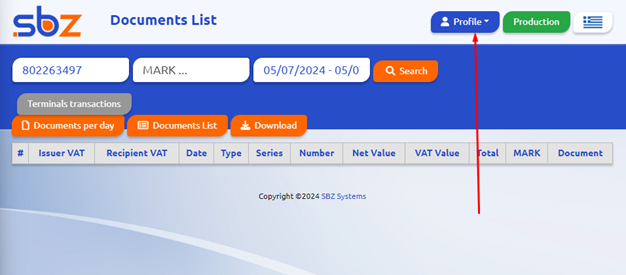
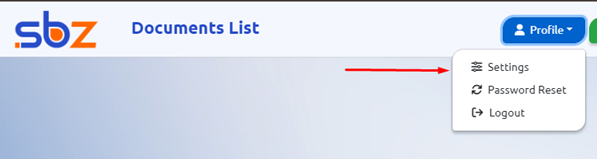
Go to “Profile” in the upper-right corner and click “Settings.”
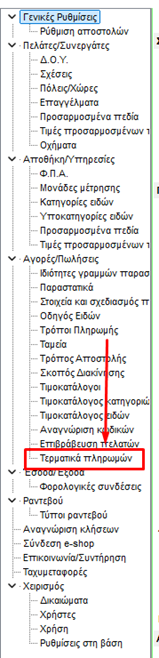
Locate the “Payment Terminals” field and enter the code previously provided by the POS terminal.

Next, select the company from the dropdown menu on the right.
In the SOURCE field, enter a name for your POS terminal, for example: CARD (please enter the name using ENGLISH characters)
Click the Add/Edit button.
A SUCCESS message should appear.
After upgrading EMDI, the following field will appear.
-
- Go to Payment Terminals, select ✔️ WebECR, and enter the POS terminal name in the “Source Name” field. The name must be entered exactly as it was entered in the API, for example: CARD.
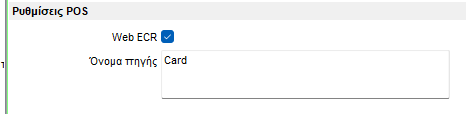
- Go to Payment Terminals, select ✔️ WebECR, and enter the POS terminal name in the “Source Name” field. The name must be entered exactly as it was entered in the API, for example: CARD.
-
- Next, go to “Payment Methods” and create a new payment method, for example: CARD POS. Set it as paid.
- Save the settings, close the Settings window, and then reopen it by clicking the gray Settings ⚙️ icon.
- Go to “Payment Methods.” Under CASH, set the payment method you created earlier, CARD POS, as the additional payment method.
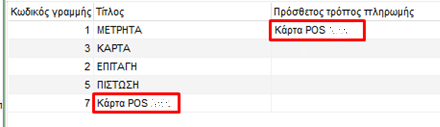
-
- Since an additional payment method has been assigned to CASH, you must adjust the settings to prevent reporting issues. Go to the gray Settings ⚙️ icon, select Purchases / Sales 🔴, and enable ✔️ Payment method selection and automatic selection of the additional payment method.
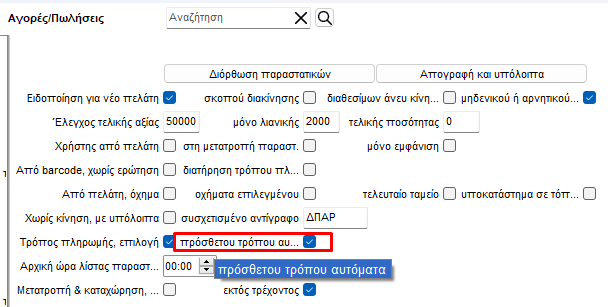
- Since an additional payment method has been assigned to CASH, you must adjust the settings to prevent reporting issues. Go to the gray Settings ⚙️ icon, select Purchases / Sales 🔴, and enable ✔️ Payment method selection and automatic selection of the additional payment method.
-
- Proceed to Fiscal Connections and then Variable Mapping. For the payment method you have just created, select POS in the “MyData Payment Method” field.

- Proceed to Fiscal Connections and then Variable Mapping. For the payment method you have just created, select POS in the “MyData Payment Method” field.
-
- To receive payments through a Payment Receipt, go to the gray Settings ⚙️ icon, select Fiscal Connections, and then Variable Mapping. Change the settings so that they match the image below:
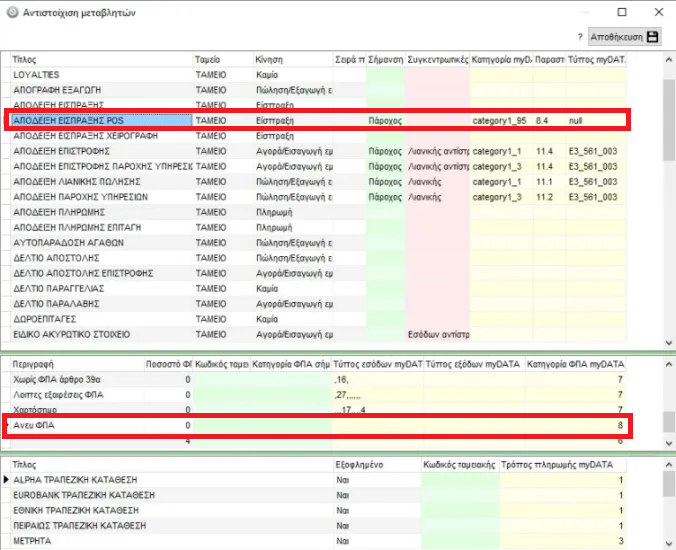
- To receive payments through a Payment Receipt, go to the gray Settings ⚙️ icon, select Fiscal Connections, and then Variable Mapping. Change the settings so that they match the image below:
-
- Finally, go to Purchases / Sales 🔴 and create a test Retail Sales Receipt using the product name POS TEST and an amount of €0.10. The CASH payment method must already be selected by default so that the following window appears when the transaction is submitted.
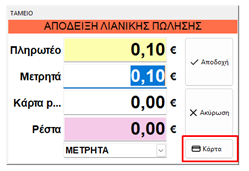
- Finally, go to Purchases / Sales 🔴 and create a test Retail Sales Receipt using the product name POS TEST and an amount of €0.10. The CASH payment method must already be selected by default so that the following window appears when the transaction is submitted.
-
- In this window, you can split the payment when requested by the customer, for example by charging half to a card and receiving the remaining half in cash.
- Whether the payment is split or not, click the 💳 Card button when a card is used.
-
- A window will appear asking whether an installment or a tip should be added.
- Select the card payment method you created, CARD POS. Press the green button on the POS terminal to send and complete the payment.
- Create a return receipt as well, so that the funds are refunded to the card through the POS terminal.
- When everything is working correctly, go to api.sbz.gr and verify that the 💳 icon appears next to the documents that were paid by card.
