


EMDI offers the ability to import data from many software solutions on the market, including text-based files, making data transfer and data sharing easy when you want to move away from older software.
The file imported into EMDI can be Microsoft Excel 97-2003 (.xls), Excel (.xlsx), or a delimited text file (.csv/.txt/.db). It does not matter which application the file comes from, as long as it is either a standard Excel worksheet or an Excel/CSV export created by software that supports export.
The import process in EMDI is simple and applies to the CUSTOMERS / SUPPLIERS and INVENTORY tabs, allowing automatic import of complete customer and item data.
What Import Does in EMDI
- Opens the file and displays all columns for mapping to database fields.
- Provides automatic mapping suggestions when headers are present.
- Supports inserting new records or replacing existing ones based on a key column.
- Saves import profiles for reuse.
- Supports per-column transformation rules directly in the import screen.
- Allows importing a row range (From – To).
- Supports up to 255 import columns with dynamic mapping controls.
File Specifications
- The file should contain clean columns with no merged cells.
- The first row can be headers (recommended).
- For replacement, use a unique field (for example: Code, VAT ID, item code).
- For CSV, set the delimiter correctly (for example: ; or , or | or space).
- You can set default values in 2 fields (constant values per import).
- If header labels contain #, they can be used for automatic price-list field setup.

Import from Excel to Customers/Suppliers
- Go to Customers/Suppliers.
- From EDIT, enable customer-file modifications.
- Select import from file and open the Excel/CSV file.
- If you loaded a text file (.csv/.txt/.db), set the delimiter (for example ; or , or | or space) and, if needed, the starting data row.
- Map each file column to the matching database field. The application suggests mapping automatically when headers exist.
- In “Replace all based on column”, set the key field (for example VAT ID or Code) if you want to update existing records. Without a key, only new records are inserted.
- Optionally save the import profile (mapping, rules, options) for quick reuse in future imports.
- Click IMPORT.
In webclient mode, the file is uploaded temporarily to the server for import and is automatically cleared after loading.
Import from Excel to Inventory/Services
Follow these steps to import products or services:
- Go to EMDI Inventory.
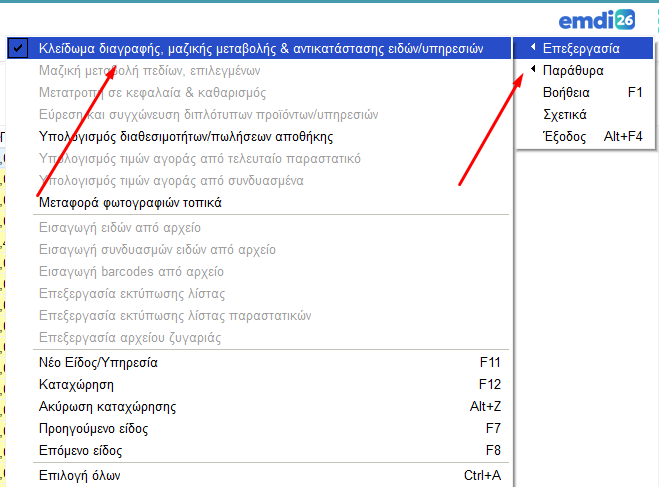
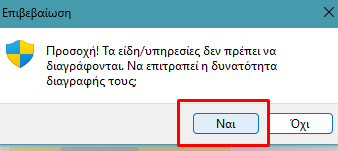
- Open EDIT and disable deletion lock / mass-change lock.
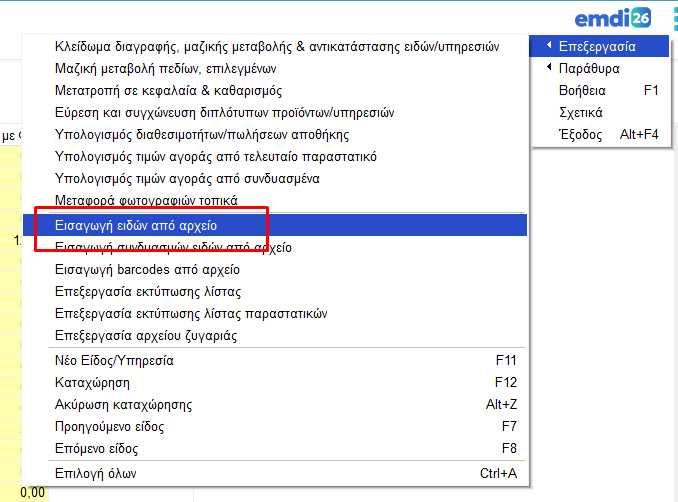
- Again from EDIT, select IMPORT ITEMS FROM FILE.
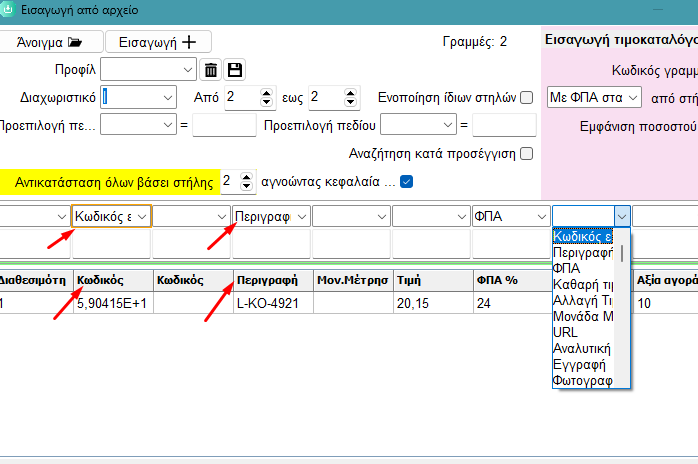
- In the new window, click OPEN and load the Excel/CSV file.
- If you loaded a text file (.csv/.txt/.db), set the delimiter (for example ; or , or | or space). You can also limit the row range (From – To) if you only want to import part of the file.
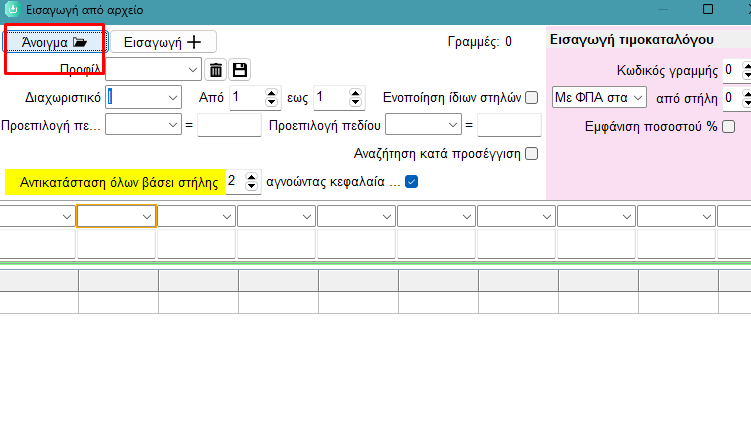
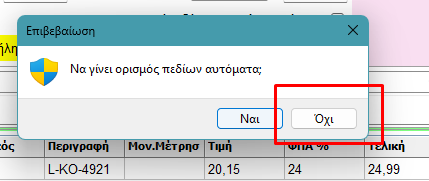
- Map columns correctly (code, description, unit, price, VAT, etc.). The application suggests mappings automatically when headers are present.
- Set a key column to replace existing items (for example Code or Barcode), or leave it empty to insert only new items. Optionally save the import profile (mapping, rules, options) for quick reuse.
- Click IMPORT.
Note: Quantity (availability) is usually updated through purchases/sales (document lines), not by direct mass replacement in inventory.
Useful Import Options
- Ignore lowercase/uppercase: compares values case-insensitively, useful for inconsistent code and description formatting.
- Merge fields: combines text from multiple columns into one database field (for example surname + name -> full name).
- Price list: maps columns for immediate price-list update during item import.
- Price-list calculation mode: 9 available modes including fixed price, with/without VAT, based on purchase or sale price, and percentage markup.
- Document fields: map number, series, date, notes, assignor, delivery, and custom fields (custom1-5).
- Profiles: save all options for future imports.
- Item search in lines: besides the main item code, lookup can use barcode, custom indexed fields, or purchase code; an alternate prefix for a secondary code is also supported.
- Line price assignment: choose whether line price is taken from item purchase price or sale price.
- Customer code in documents: choose whether customer mapping is based on Code or VAT ID.
Special Notes for Document-Line Import
- You can map extra movement fields: position, portion, expiration, line, weight, value, area, volume.
- A document can be auto-created when it does not already exist, with full details (series, number, payment method, comment, custom fields).
- In the “in documents” filter, a list of codes is supported, or * for all documents.
- The “total availability” option is available for special quantity handling during line import.
Import Rules
Value-conversion rules are configured directly in the import screen, in dedicated rule fields under each mapped column. Each rule follows the format file|database|replacement and is applied before data is saved.
- Per-column rule setup: Each import column has its own rule field. Enter lines like: file_value|database_code|replacement_value
- Automatic generation (“Insert unique column values”): Right-click a rule field and choose “INSERT UNIQUE COLUMN VALUES” to generate a template from unique source values
- Save and reuse: Rules are stored with the import profile (“Save Profile”) and applied automatically in future runs with that profile
- Rule example: If file column is “A” and it must become “DECEMBER”, use: A||DECEMBER. If the file column is “A” and only when the EMDI database entry is “B” should it be changed to “DECEMBER,” use: A|B|DECEMBER.
For technical reference, the internal rules storage format remains:
|
1 2 3 4 |
column|file|DB|set 9|Yes|3|Yes 9|Yes||No 9|Yes|No|Yes |
CSV Example
If the file is CSV, first set the correct delimiter in the “Delimiter” field (for example ; or , or | or space).
|
1 2 3 4 |
CODE;DESCRIPTION;UNIT;PRICE;VAT;DETAILED DESCRIPTION 6314;MUG;PIECES;9,50;24;MUG WITH PATTERNS\nAND PLASTIC LID 6307;MUG;PIECES;15,00;24;MUG WITH PATTERNS 6231;PLATE;PIECE;8,00;24;PLATE WITH PATTERNS |
To create a line break inside description text, use \n.
Notes
- Keep a backup before any mass import.
- Test first with a small sample (10-20 lines).
- Save separate profiles per supplier or file type.
- Always verify the key column before replacement.
With the right combination of profiles and rules, import in EMDI becomes fast, repeatable, and safe.